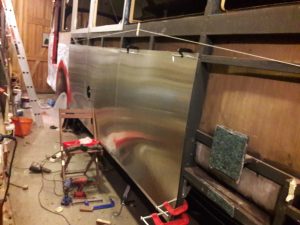
First job of the week was to permanently fit the panel around the foothold immediately behind the cab. Making sure there was room to fit the O/S indicator meant a slight modification to the location of the conduit bringing the cable up to the indicator in order to provide long enough tails to connect to the indicator base. Work continued fitting the waist panels, including marking out and the final panel from a remnant left from the wheelarch panel. Next a small, fiddly panel had to be made that finishes the waist rail and folds around the cab door pillar rebate; I did this twice though the second effort was not much of an improvement on the first! Finally the panel that completes the area below the cab step was cut and fitted and the kick panel marked out for cutting.
Tag Archives: exterior panels
10/12/2023
First job this week was the installation and testing of the panel light. Next, panelling the O/S began with the one l immediately in front of the O/S rear wheel. The next panel is in front of the tank so required some complex cutting out. I reused a round casting from the MW to bead the opening in front of the fuel gauge, but this will need some final adjustment to fit. As I progressed with the panelling I found that a small alignment error had crept in which I should have eliminated earlier, so the final panel next to the driver’s door had to be cut to an odd shape, keeping in mind the cuto out for the foothold and the hole for the wiring to the indicator. However the error in aligning the panels will be hidden beneath the beading so not a great problem, just annoying. Use of panel sealant meant I couldn’t easily remove a panel to correct the error once fitted.
8/10/2023
Applying undercoat by spray turned out to be more trouble than it was worth and the finish was just as good from a roller. So I applied another coat to both the o/s rear corner panel and the mudwing. The mudwing will need a bit more flatting and another coat before its finished. This week I have been making starter motor cables and shortening the dynamo cables so they will fit the control box when it is reinstalled. I also applied filler to the bottom of the rearmost o/s panel where it meets the frame and is flat as it fitted poorly to the vertical beading just before the emergency door.

