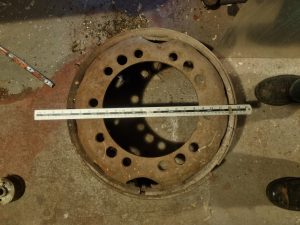
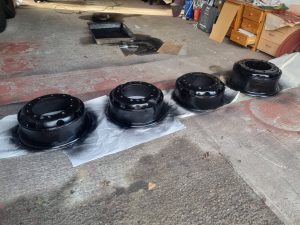
First job this week was to finish countersinking the O/S half-round waist beading. Then I temporarily fitted the longest piece to align it and drilled enough fixing holes so that I could fit it myself. Noted some rust appearing on the non-opening window frame behind the cab. It sanded off easily, though. Next job was to prime the rear of the prepared beading, in lieu of using sealant which creates too much mess. I then decided the misaligned beading at the emergency door was not acceptable so moved the corner beading down by at least an eighth of an inch. This took a long time and was very difficult to achieve a good job. I shall tackle the emergency door next. An improvement in the weather meant I was able to finish painting four of the wheels and part finish the remaining three. I have run out of paint now so the three will have to wait but they are at least partially sealed. The following day was dry and sunny so I wire-brushed another set of wheel rings and primed them with red oxide, applying a second coat the following day. I fitted the long half-round beading on the offside but ran into a problem by breaking a small pilot drill with the end stuck in the hole, removal of which is a job for later. I next gave the primed wheel rings a coat of black enamel, then fitted the short piece of beading to finish of the O/S waistrail half-round beading. I needed to drill two extra holes in the beading due to the coincidence of holes with mounting screws for the panel work underneath. This means I have to fill the two unused holes, first job for next week!
Tag Archives: Emergency door
26/1/2025
A slow start to the week. I finished spraying brown on the various parts of the cab window frame, then drilled a 4m length of half-round beading; in 100 holes, I managed to get one slightly off-centre. I decided to use this for the curved section and the short piece for the emergency door, which may allow me to omit the off-centre hole. I cut and fitted the curved rear corner piece up to the emergency door the following day, then fitted the vertical wind deflector and beading to the to the emergency door with the handle recess casting temporarily in place. I am unsure that the beading is correctly aligned at the moment though. However, I decided to proceed with the beading and drilled and started to countersink a 4m length of half-round to complete and fit on Monday.
31/12/2024 and year summary for 2024
As this is Christmas and new year week, not much got done but I started the week by completing and testing the wiring of the boot light and its switch. After Christmas, the first job was to update the plan for 2025. When I got out to the bus shed, I primed the remaining cab woodwork as a prelude to painting, ready for fitting of the cab window. I then cleaned and polished the fixed pane of the cab window and cut the remaining piece of steel channel for this pane. I’m awaiting the arrival of some steel angle to complete this with the draught excluder. I also primed the aluminium panel below the cab window on the inside of the cab door and some of the woodword on the emrgency door got a second coat.
As this is the last entry of the year, a summary of work completed in the last twelve months is appropriate.
All the offside half-drop windows were assembled and installed.
New window frames were constructed and new glass fitted for the final non-opening offside window and the emergency door window. The cab offside window was glazed.
The emergency door was rebuilt with new exterior panels and the new window, then rehung and externally primed.
Attention was given to cab details, including the grab handles, fire extinguisher and holder, and the interior lights switch box which was repaired and painted. Paint was stripped from under the front canopy. A new panel was fitted to the inside of the cab door and the cab window frame and slam lock repaired.
The seats were removed, and retrimmed in the correct moquette (sourced from Facebook appeals) and brown vinyl by Ifor Evans. The driver’s seat was also retrimmed by Ifor.
On the electrical side, the indicator switch in the cab was partially cabled, the destination box had the bulb holders installed and wiring through to the cab completed. The boot lamp was installed and wired up to a the switch and successfully tested.
The wheels had their tyres removed and the rims sandblasted and partially primed.


